
Sitecore projectstarter 2.1.0 has been released on nuget and Github. New features are:
- Support for Sitecore Habitat (!)
- *.config.transform files are applied to your config files (supported in non-habitat projects also)
- Include AutoPackageInstaller in your project (if a sitecore package is dropped in a hot folder, your next request will tell you to install this package)
- Removed all my other nuget packages, leaving them as an option for you to install
So, you want to get Sitecore Habitat up and running in minutes? You want to build Sitecore Habitat from one visual studio, not using any gulp files? The new version of Sitecore Projectstarter does just that.
You can still use Sitecore Projectstarter to get your plain empty sitecore environment up and running, this works the same as in version 1.0
To get habitat up and running:
- Clone Sitecore Habitat from https://github.com/Sitecore/Habitat
- Open the Habitat.sln file
- In the package manager console type:
install-package boc.sitecore.projectstarter -projectname sitecore.common.website - The install process will now start
- It will ask you for
- a Sitecore zip file (Sitecore root-zip download)
- a Sitecore license.xml file
- Webforms for Marketers zip file (the mail download from dev.sitecore.net) -> Habitat’s Form module is dependent on this
- Once the package is done installing the projectstarter, just hit ctrl+F5 to run your Habitat demo (or any other shortcut to run your default project :))
- Once started, ProjectStarter will notify you that Webforms For Marketer needs to be installed first (this is the package hot folder feature)
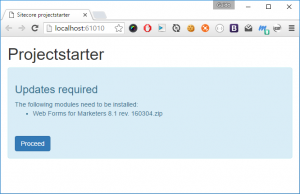
Hit proceed to do so - After the package has installed, projectstarter will redirect you to the unicorn-sync. Once unicorn is done: go to the root url of your website (http://localhost:61010/ by default) to enjoy your Sitecore Habitat demo

Next, you’ll have to decide what hostname you’re gonna use. You could attach an IIS website to your SitecoreRunner project or just leave it as is. The default Habitat demo website is attached to habitat.dev.local. If you’re going to use anything else, modify the Habitat.Website.config and/or Common.Website.config files accordingly